

Verifying a Sender
Verifying a Sender
Verifying a Sender
Skip to troubleshooting section at the end if you already added DNS records.
Verifying a sender identity - email or domain the emails are send from - is a required step for sending emails on most email platforms, not just BigMailer. Without a verification step, anyone could send emails on behalf of anyone.
There are 2 places where the sender verification is managed:
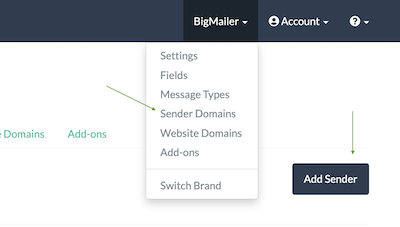
Click on your brand name in the header to open the menu, and select "Sender Domains", then click on "Add Sender" button on the page.
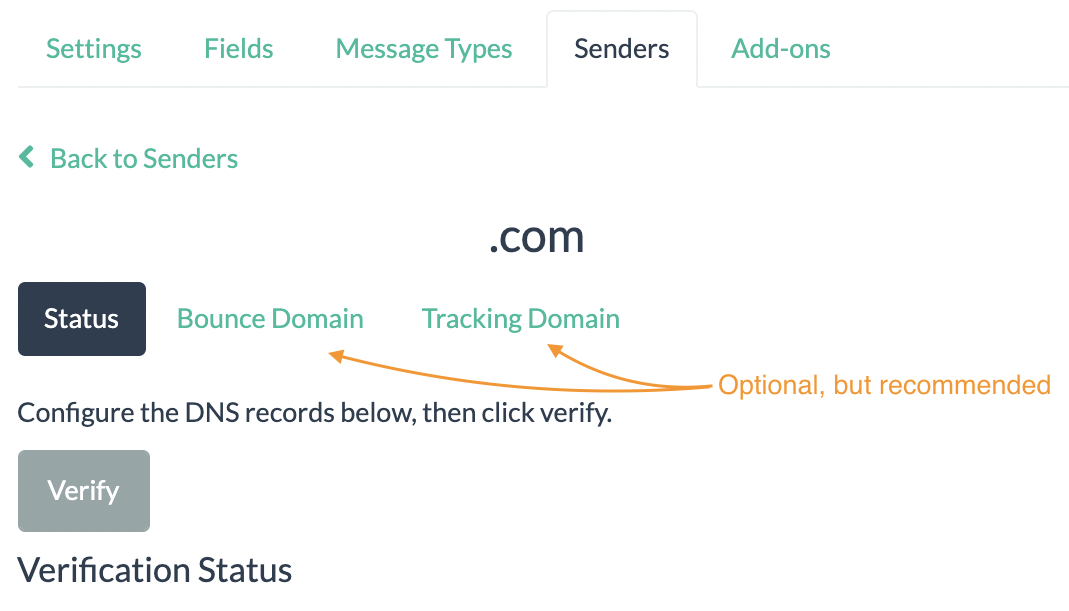
You will need to add a TXT type DNS record to verify a sender domain. Adding CNAME type DNS records for custom bounce and tracking domains is optional, but highly recommended for better delivery and inbox placement due to more authentic looking email and email headers.
You can manage your senders under SES from the menu under Account link in the header. When using SES the senders are stored under each SES connection since multiple brands can use the same SES connection. You have to be an Administrator or Account Manager to access SES connections page and manage sender verification records.
Adding DKIM and SPF Records
While wasn't required required prior to February 2024, it is now required by Google and Yahoo to have DKIM record for senders who send more than 5000 emails per day. Please see our help pages on DKIM and SPF for detailed instructions.
Custom Tracking Domain
Adding custom tracking domain to replace a generic tracking link used by BigMailer for your links can improve inbox placement. It involves adding a DNS record for the sub-domain on your domain and takes 3-5 min to add and 1-3 hr to auto-verify. For example, email.your-sender-domain.com or clk.your-sender-domain.com. This option doesn't cost extra most of our customers setup custom tracking domains.
To add a custom tracking domain, go to your senders page and click on the domain name you want to add custom tracking to. Click on the "Tracking" tab, then add the sub-domain you want to use for custom tracking (clk. or em.) and submit the form. You will see instructions for adding DNS records to your domain. Make sure the sub-domain you choose isn't already in use for something else or you can break existing service (e.g. email plugin on your Wordpress site may already use email sub-domain).
Troubleshooting Your DNS Records
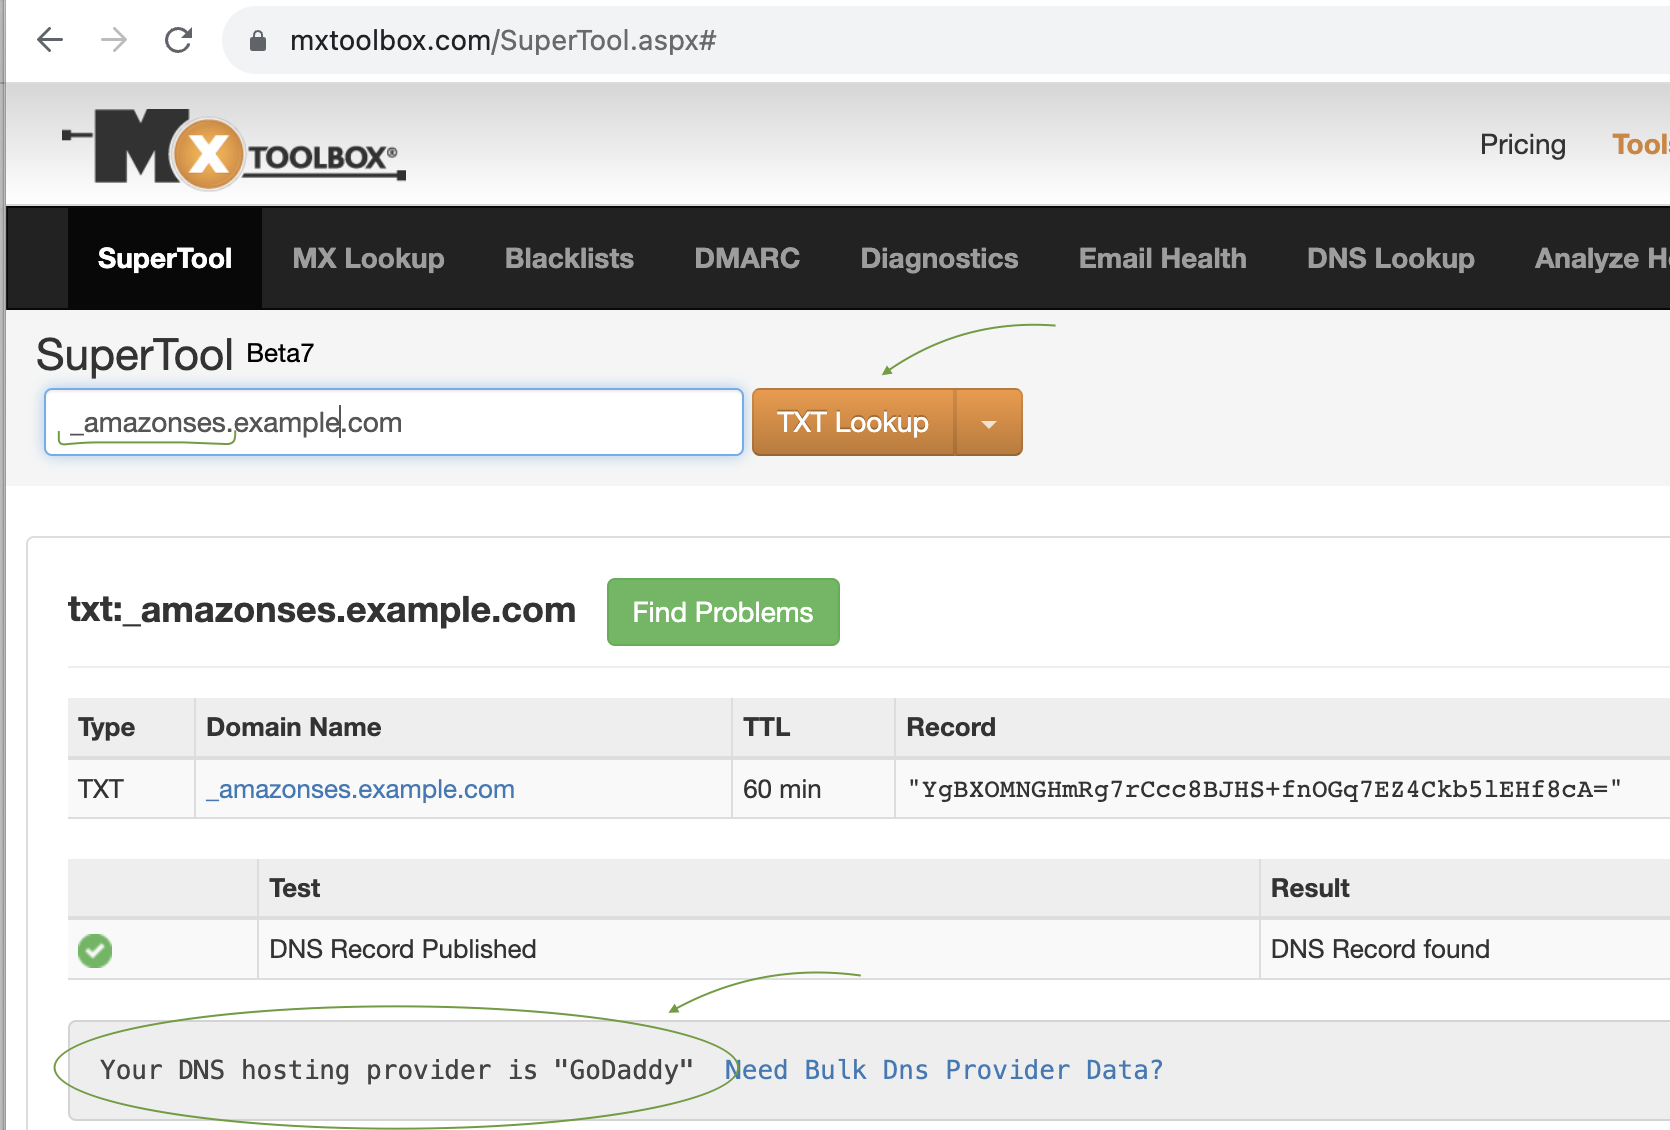
You can check your DNS entries via this tool to confirm they were added correctly. Sometimes DNS records are added in a wrong place and this tool can also tell you who is the DNS provider for your domain. See example of how you would check for TXT record:
If you added your sender domain and confirm using the tool above but it's not verified in BigMailer UI, we may need to manually re-trigger a check so reach out to us via chat. The automated checks stop 72 hours after a sender record is added, so if you waited more than 3 days to add DNS records you need us to re-trigger a verification manually on our end.
Where And How to Add DNS Records
Log in to your domain’s DNS or web hosting provider, and then add the new CNAME records containing the values BigMailer provided. Different providers have different procedures for updating DNS records. The following table lists links to the documentation for several common providers. This list isn't exhaustive, and inclusion in this list isn’t an endorsement or recommendation of any company’s products or services.
DNS/Hosting providerDocumentation links:
GoDaddy - Add a TXT record
DreamHost - How do I add custom DNS records?
Cloudflare - Managing DNS records in Cloudflare
HostGator - Manage DNS Records with HostGator/eNom
Namecheap - How do I add TXT/SPF/DKIM/DMARC records for my domain?
Names.co.uk - Changing your domains DNS Settings
Wix - Adding or Updating CNAME Records in Your Wix Account
If you're not sure who your DNS provider is you can use MX Toolbox to check, see Troubleshooting section above.
Updated 3 months ago